

Integrate DBine with Tiger Cloud
Query, browse, and administer your database from a free, open-source desktop database manager
DBine is a free, open-source (Apache 2.0) desktop database manager for Windows, macOS, and Linux. It has a SQL editor, an object explorer, query plans, schema compare, and a server monitor, and it works with 130+ databases and cloud services in the same window.
This page explains how to integrate DBine with your Tiger Cloud service.
In this integration guide, you:
- Connect DBine to your service with its TimescaleDB connection type.
- Browse your schema and run queries from the DBine editor.
- See your hypertables and background jobs in the DBine server monitor.
Prerequisites for this integration guide
To follow these steps, you'll need:
-
These steps use Tiger Cloud, but the same approach applies to a self-hosted TimescaleDB instance.
- Your connection details.
- DBine installed. Download it from the releases page.
Connect DBine to your service
Section titled “Connect DBine to your service”To connect to Tiger Cloud:
- Open the connection form
In DBine, click
New connectionin theExplorer, then selectTimescaleDBfrom the list of engines. - Configure the connection
Fill in the connection name and use your connection details for the server, port, database, user, and password. New connections verify the server's certificate by default: the
SSL/TLStab setssslmodetoverify-full, which works with Tiger Cloud as is. - Click
Test connection, thenSave and connectA successful test shows
Connection successfuland the server version.Save and connectsaves the connection and opens it in theExplorer.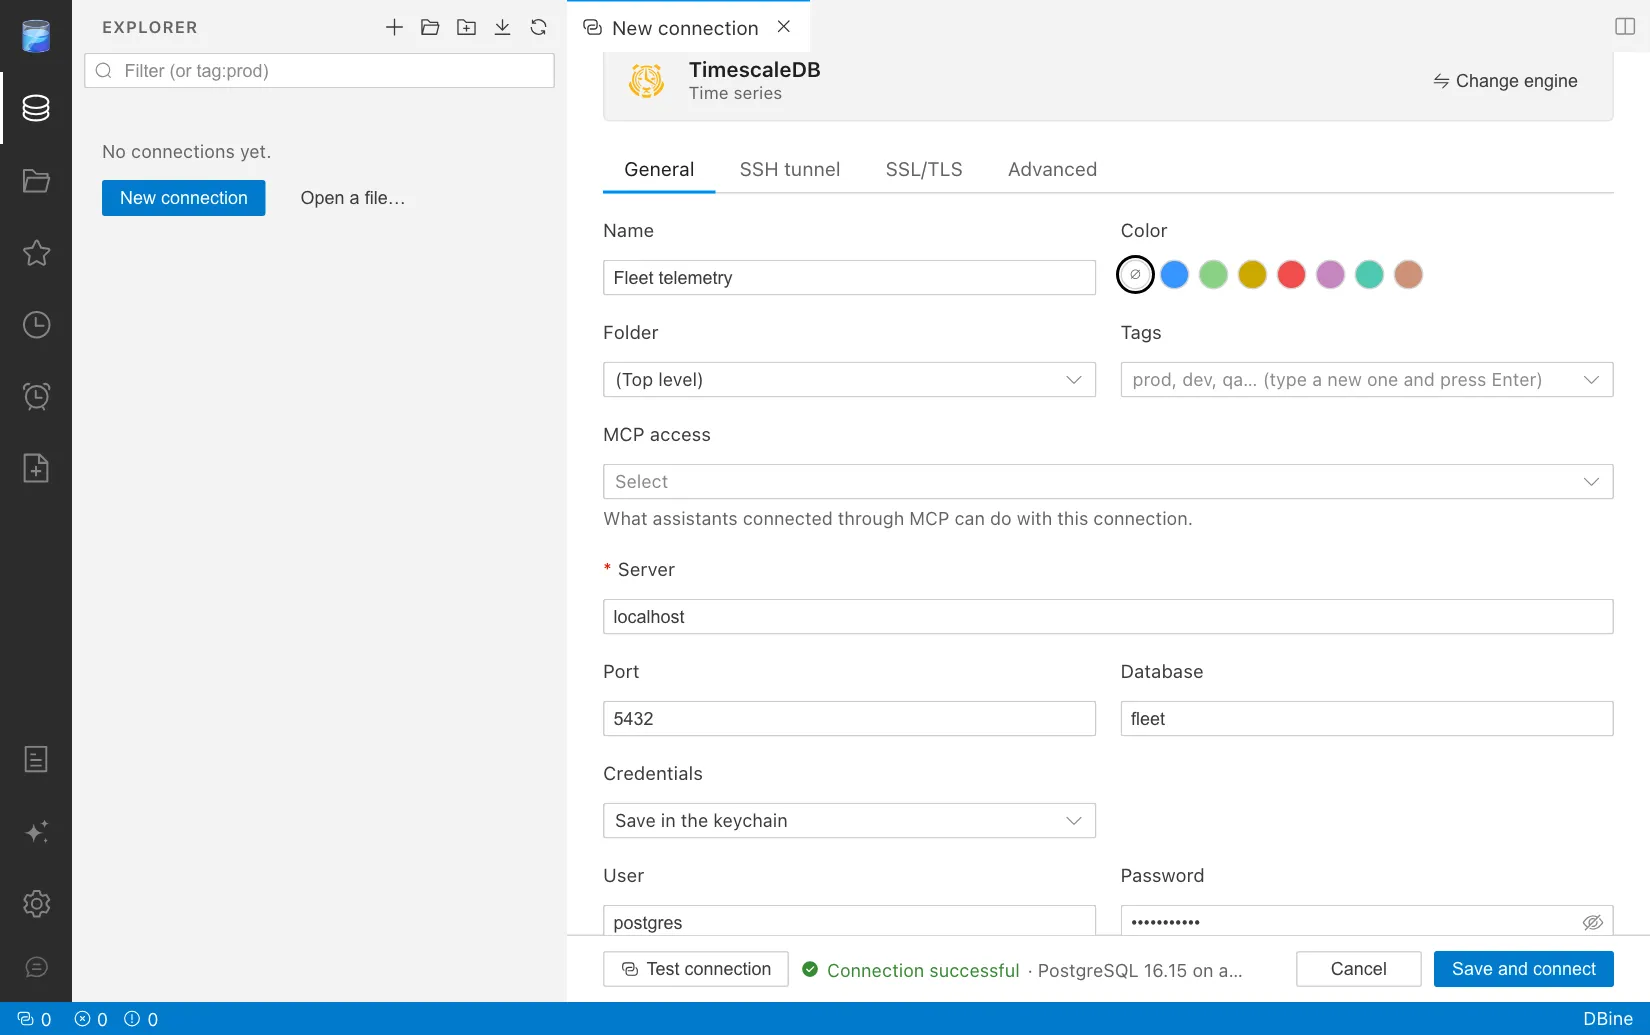
You have successfully integrated DBine with Tiger Cloud.
Verify the integration
Section titled “Verify the integration”- Browse the schema
In the
Explorer, expand the connection and the database, and then thepublicschema if your database has more than one. Your hypertables are listed underTableslike regular tables, and continuous aggregates are listed underViews. The internal_timescaledb_*schemas are not shown. Expand a table to see its columns and their types, and its indexes. - Run a query against a hypertable
Right-click the database and choose
New query. Write aSELECTagainst one of your hypertables, for example:SELECT time_bucket('1 day', c.time) AS day,d.site,round(avg(c.temperature)::numeric, 2) AS avg_temp,round(max(c.temperature)::numeric, 2) AS max_temp,round(avg(c.humidity)::numeric, 1) AS avg_humidityFROM conditions cJOIN devices d USING (device_id)WHERE c.time >= '2026-10-17'GROUP BY day, d.siteORDER BY day, d.site;Click
Run. The results grid shows the rows, and the status bar shows the row count and the execution time.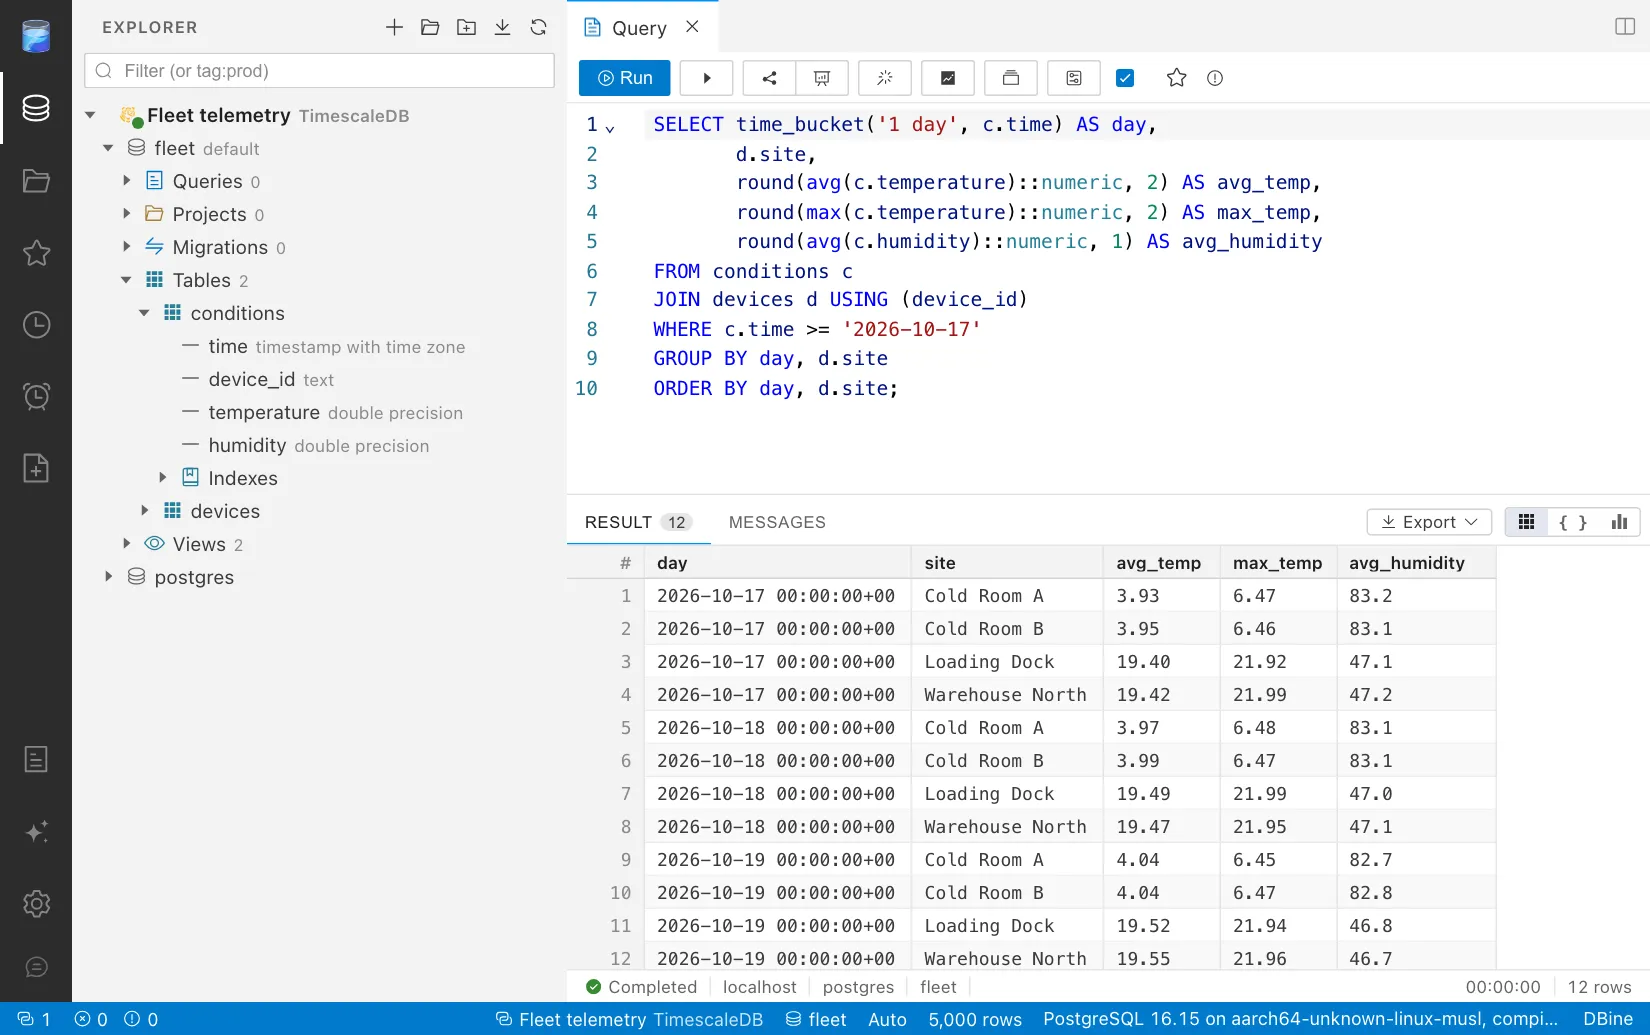
- Open the server monitor
Right-click the connection and choose
Monitor. Next to the sessions and database sizes, the monitor lists each hypertable with its number of chunks, its compression state, and its estimated size, and the background jobs with their schedule and last run.